Employee Calendar
This month-at-a-glance view enables a manager to quickly review, edit and reject time entries that have been approved. It also permits a manager to add time entries for other employees.
|
Notes:
|
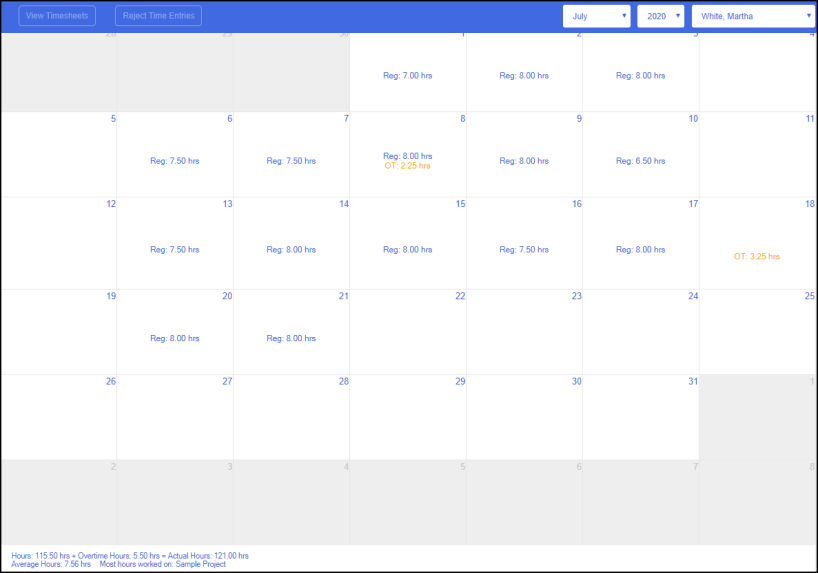
The Employee Calendar view is accessed from the navigation bar (Time & Expenses > Employee Calendar).
To review an employee's monthly timesheet:
-
Select an employee from the drop-down list located at the top right-hand corner of the Employee Calendar view.

-
Select the month and year.
The employee calendar is displayed
-
Hours shown in blue are regular hours worked
-
Hours shown in orange are overtime hours worked
To edit an employee's time entries:
-
Click on the day of the month containing the time entries to edit.
-
Click the View Timesheets button.
-
Select the time entry row to edit and click the Edit button at the far right.
-
Edit the time entry information in the pop-up window.
-
Click the Save button at the bottom of the form to save changes made.
To reject an employee's single time entry:
-
From the Monthly view, click on the day of the month containing the time entry to reject.
-
Click the View Timesheets button.
-
Select the row to reject.
-
Click the ellipsis button
 above the Project column and select Reject Timesheet.
 -
Enter the reason for the rejection. This reason is displayed to the employee who submitted the time.
|
Note: When time is rejected, the employee who submitted the time will receive an e-mail notification if this option has been enabled. |
To reject an employee's timesheet entries for an entire day:
-
From the Monthly view, select 1 or more days by clicking on the calendar day.
-
Click the Reject Time Entries button.
-
Enter the reason for the rejection.
To add time entries for an employee:
|
Warning: Time entries added using this view bypass all approval workflows. |
-
Select the employee from the drop-down list.
-
Select the month and year.
-
Select the day of the month and click the View Timesheets button.
-
Click the Create Time Entry button.
-
Select the project from the drop-down list.
-
Select the task from the drop-down list.
-
(Optional) Select the overtime rate (only available to users with appropriate security rights).
-
Check the billable box if this time entry is billable.
-
Enter a duration (in hours). This is the total time worked.
or
Enter the start and end times for the time entry. -
(Optional) Select the client overtime rate (only available to users with appropriate security rights).
-
(Optional) Enter a description.
-
Click the Save button at the bottom of the form.