Edit rejected expenses
When a manager or administrator rejects expense entries, these are returned to you for editing and re-submission. This topic explains how to determine if you have rejected expense entries, and how to edit and re-submit those rejected expense entries.
To determine if you have rejected expense entries:
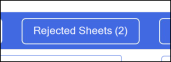
The Rejected Sheets button indicates the number of rejected sheet you have.
To edit a rejected expense:
-
Click the Rejected Sheets button near the top of the screen.
-
Select the rejected expense sheet from the Rejected sheets drop-down list.
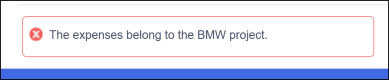
The reason for rejection entered by the person who rejected the expense sheet appears on the screen.
-
Edit the expense entries as required:
-
-
Modify the data in one or more columns.
-
Move an entire row to a different sheet by selecting the row and clicking the Move expense option.
-
To re-submit an expense sheet:
-
Select the sheet to re-submit from the Rejected sheets drop-down list.
-
When all rejected expense entries for a sheet have been edited, click the Submit button.
|
Note: When an approving manager or administrator rejects an expense entry, the entire sheet is rejected. Individual entries are not identified and it is up to the approving manager to enter the appropriate level of details for the rejection. |